While I was prepping the floor and doing the wallpapering I used the various waiting times to paint the coving. First a coat of the same paint as I used on the ceiling, let it dry, then gentle sanding with very fine sanding sponge. Then apply a second coat followed again by a light 'buff' with the sanding sponge.
Take your piece of coving and make your first 45 degree cut. There is no simple way to describe how you work out which way that will be on your coving, Do your best to visualise it and mark the direction with a pencil - you won't use that as a cutting line it is just a reminder of the way you want the cut to go when you take the wood to the mitre box. After you have figured out a few it does become easier. (If you want detailed help got to my Dalton House blog and click on the link in the margin labelled trims)
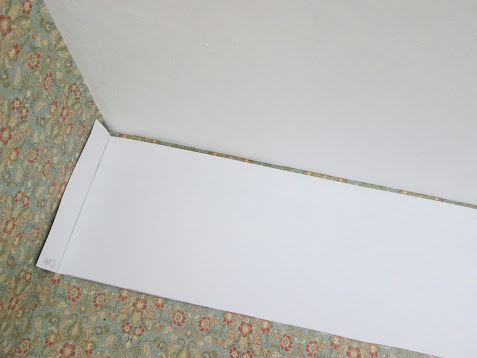
I find that measuring the space very accurately is difficult; rulers don't fit conveniently and tape measures have some slack on them and are fiddly to use. The easiest and most accurate way is to get some scrap paper longer than the space, crease a very sharp edge on one side and put in place snugly against a side wall, smooth across to the other side and use you finger nail to mark the crease where the two walls join.
The two side strips are easier, you need to cut a corresponding angle and slide the piece in place and then mark off where the front of the box comes. That becomes a simple ninety degree straight cut.
Glue in place.
At this point I am bordering on tearful. Thanks to my old friend Mr Cardboard this is where I discover that walls and ceiling do not make a lovely neat sharp right angle join so..... I can either glue the trim to the ceiling or to the wall but not to both! I settle on gluing the coving to the ceiling and try really, really hard to disregard the gap where the wall is.
I now have to decide on
- whether to cut my losses and abandon the whole project
- how to cut wood to make wooden boxes
- seeing if I can get them made
- carrying on with this one now I have got this far and see if I can just tolerate it as a sort of background to the actual things I want to display.
- - - - - - - - - - - - - - - - - - - - - - - - - - -
PS: a couple of days later ......
Huge apologies I have just wasted a chunk of your life, unless you wanted a demo on not using cardboard for making room boxes.
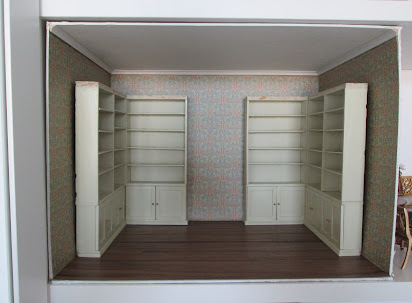
After trims and floors were dry I took a dry run with the bookcases. This showed me just how much the side walls were bowed.
I appreciate that this wouldn't matter so much on a room that just has normal freestanding furniture in it but in a room that requires bookshelves to go against a wall it just won't do for me. Also one of my boxes will be a fully fitted kitchen and there is no way I can fit a kitchen against wavy walls.
I am upset on many levels. As well as some hours of careful work lost I have also lost the wallpaper, flooring and trims. The wallpaper was all I had left from the original Chinoiserie order. I have just bought a couple of other papers from them again and it cost an arm and leg in postage as well as being quite pricey paper. Ditto with the flooring from another supplier. Even more exasperating are the three trims. When I was ordering the things I needed for these six boxes I worked on lists for days to try and consolidate as many items as I could get from the least number of suppliers (postage saved) and then discovered I had forgotten these three pieces of simple coving. I think the postage cost more than the trim and now I have to do that again.
Hey ho, do I delete these posts and just start this blog again or leave them to show things you might want to ask yourself if using cardboard?
Meanwhile I may have found a source to cut me some 6mm medite (moisture resistant mdf). I have sent them a bunch of questions and hope to have an answer soon.


This has been quite the learning experience for you. I feel your pain in striving for perfection and the materials let you down. Beginning with sturdier boxes is the best path as you will never be satisfied with the results you are getting with cardboard.
ReplyDeleteI was so disappointed but also annoyed with myself. I sort of knew when I set off it probably wasn't going to be what I wanted but once I spent time and money on it I just kept going forwards. Hate to admit defeat. Vanity all is vanity. 🙂
DeleteThank you Marilyn! As always, sage and helpful advice for miniaturists at all levels!
ReplyDeleteI have had the displeasure of having to make do with warped kits, though they were wood and not cardboard. You have done a stellar job in spite of the obstacles, and what we see during the close up construction phase is never such a big deal when appreciating the finished room. But perfection is a goal we can't help but pursue.
One tip that may come in handy. Russ is a very experienced carpenter. He does such beautiful trim work in real life homes, including our own. We installed crown molding (and lots of other kinds) throughout our house, and one thing I learned: trim will always need to be caulked before painting. This is because wood is natural, and so will always be imperfect, even if the installer is. Next time there is a choice between papered wall or painted ceiling, let the ceiling have the gap. Then fill the gap with caulking, putty or wood glue as you would caulk. Sand a little if needed, then paint. It will LOOK perfect, thought it may never be.
Big hugs, big breath, no starting over the blog or giving up. We are all on this learning journey with you! Thank you for being the one to whom the stress and spending are burdened. Can't wait to see the new plan get started!
This is why I blog! …… kind mini folk who support and advise and generally pick you up off the floor. Thank you hugely for your kind and supportive comment and the excellent notion of caulking trims. As you say in real life and minis, however skilled you are, a wall and a piece of wood are going to run out to some degree as neither will be perfect. I sincerely wish I wasn't such a nit picker about stuff being right. So many people in this hobby just crack on and have fun, I suppose my version of fun is getting everything right 😂. Too sad really. Onwards and upwards. Thank you again for being here.
DeleteOh dear Marilyn, I feel your disappointment and frustration! It is not just the time or money spent - it is that bitter disappointment of simply not having things work out the way we imagined.
ReplyDeleteI do hope you can salvage that pretty wall paper - Could you perhaps 'recycle' the papered box as kind of a liner inside your new timber box? Gluing the card to wood might hold and support it so you can flatten the bow? I don't know - just an idea.
Isn't it just so easy to get carried away making, even when you kind of know and feel it may not work
I do love your tip on how to measure for coving and skirting and will definitely keep it in mind for me next project.
Anna X
Thank you Anna. The box within a box might have worked though I suspect I would be too fussy and would be tetchy having to look at a 'mistake' forever. Since jumping on it in despair I have realised it would have been useful for at least a couple of things - staging things to sell or giving to my grandson to play with along with some furniture I don't want..... Hey ho, I should really to listen to my own advice of deep breath and walk away - leave it for a while etc etc.
Delete