Showing posts with label Boxes. Show all posts

Saturday, 4 December 2021

The idea seems to be growing

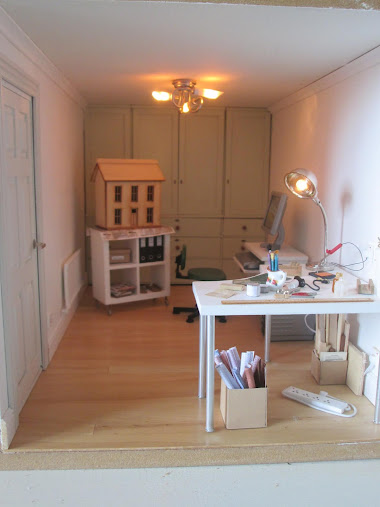
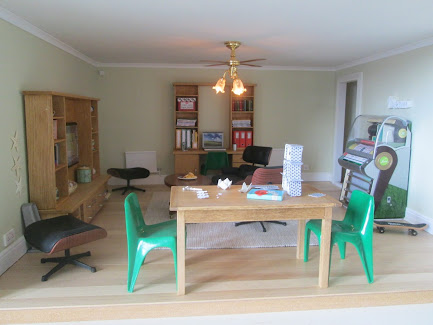
The idea of a few room boxes seems to have grown.  The original idea was to (re)make half a dozen of the rooms from Dalton House.  This immediately changed into five of the Dalton rooms and a brand new large Elf kitchen project as I couldn't rejig the Dalton one into the room box space.

I wanted to do it after giving up on making miniatures so that I could save (and display) some of my favourite things.  How I wish I had known this would be the plan when I first began this game as I have sold and given away some lovely pieces over the years that cannot be replaced.  Take note newbies out there - hang on to every little thing because you never know when you might want it again.

I have decided the planned music room needs enlarging - it needs to be wider - so it will now occupy a shelf to itself.  This demanded a rejig of the boxes on the shelves and this led to a box vacancy.  I felt the bedroom might be the modern room to fit in that space as it is probably the least contrast to the  Georgian style rooms around it.  Whilst deciding all this it seemed a shame that the simple bedroom was getting a reprieve whereas the more interesting Rec room and the Hive (my workroom) would be effectively 'binned'.  They are now in play.  Six rooms will now become nine.


Most of these will need to be set out in a different way as the dimensions of the Dalton House rooms and the measurement of my boxes are not the same.  I am suffering particularly from lack of depth.  If you go down this route any time be very determined as to what size you want your boxes to be and buy the cupboard accordingly.  I could have had a deeper 40cms Billy which would have been spot on but the whole point of my getting rid of the house was to give me more space in my office (now also my workroom) so the 30cms compromise was the right decision for me.

This had led to a bit of a struggle.  The rooms, as they were originally, have become fixed in my mind and  seem immutable.

So, more challenges ahead and a longer project than I thought.


_________________________________


There may be a bit of a pause here for a couple of weeks or so.  My daughter and family will be staying with us prior to moving into their new home a few houses away so I am not likely to be playing minis for a while.  👏

Saturday, 20 November 2021

Library

This should really have a subtitle of  The pedants guide to 'stuff'. 

Painting needed for the library was just the ceiling.  I tape the front edges of the boxes when doing this and press down really well so the edges finish paint free when the tape is pulled off.


Here is my third order of the same three pieces of (pricey with postage charges) Les Chinoiseries wall paper.  First lot went in Dalton House, the second lot went in the cardboard fiasco but I was grimly determined to have this paper for the library.  I even have matching fabric and red silk for the drapes.  They never got made for Dalton and (obviously) can't be used in the room box.  So to just get three papered walls mostly covered by book shelves is an expensive fixation. Enjoy every little inch you can see here.


I like to cut wallpaper from the bottom up.  The thinking behind this is that if I trimmed the top edge to remove the name strip and then measured for the strip of paper I would end up with two edges cut by me both of which may not be all that wonderful.  In the main that wouldn't matter if was a bit wonky because generally the edges will be covered by coving and skirting.  By using the bottom edge as an already cut edge I have just saved myself one lot of cutting (times three on all three papers) and I have an absolute guarantee that the pattern will all run perfectly in line around the room.

I make a thin card template of the height of the room, lay that on the paper in three or four places marking the top, remove and join up the marks using a yardstick.


Wallpaper prep - left to right - wet flannel to keep wiping sticky hands clean, dry soft cloth for dabbing paper in place, border adhesive, dry flannel to dry hands after cleaning, ruler, sharp scissors of a good size to get lengthy cuts, paper scorer for any folds needed, propelling pencil


Et voila one painted and papered library.  
The Dalton House library had one of my trompe l'oeuil effects behind a partly open door but there is no way I have room to replicate that here but I still wanted that central door.  Little did I know what a kerfuffle that would be.  I contacted and ordered (in turn) from three of my trusty suppliers for the usual flat back false door that I used in Dalton house attic apartments back walls.  First one came with a stupid back frame which needs the hole to be cut to set it in.  Double whammy - no way was I doing that.  Second one the same but this supplier said the factory in China who had made the perfect false doors had changed hands and in the process changed the design on this door.  She has contacted them and there is a promise to change back but clearly that will take an age.  Meanwhile I had a conversation with another vendor who makes his own stuff and was assured his were flat back.  They are but I am too fussy.... they are a rectangular piece of routed MDF so the wood quality is not good and I like a separation between frame and door.  Nothing for it but to do a cobble of my own.  Firstly breaking down a normal opening door kit and removing the pin, paint, add door furniture and stick to the wall.


The usual framing is then too thin to go around the door and look right.  Luckily I had two sets for some reason so they were trimmed to size as they were slightly too tall without the threshold piece in place, and then glued back to back to make the required thickness..


Door frame added and it all looks OK.


I miss the clever trompe l'oeuil effect and the figure walking through the door but I have to keep impressing on myself this is not what these boxes are about they are simply mementos of work done and hold things I don't want to part with.

The light went in next.  This was a straightforward centre of the room light and there are no lamps to add to this room.

There has been much switching around of various lights from room to room.  This is not unusual in this mini game as I am never quite happy with the range of lights available to us, but this seemed to be the least worse for a library atmosphere.  The Dalton House room was fitted with down-lighters (can lights) in front of the shelves and had a system to control the humidity and temperature of the room to help preserve very old books. 😂


Just a reminder to test each time you do something with a light - is it working OK before you start?  Still OK when wires threaded through and light glued in place?  Still OK after extending the wires if you need to?  It is easy to do  -  just press each wire (after splitting in two and exposing the copper wires)  on to the terminals of a nine volt battery.  Not easy to see here but I am pressing one wire on on terminal with my ring finger (left) and then touching the other terminal with the other wire (right).


The wallpaper went in well and there is no nasty gap in the join of ceiling to wall, plus this is a modern room so I decided against coving even though it was all painted ready to go.  It brings too much distraction into the room where I want the shelf contents to be the focus.

So it was just a matter of cutting four small bits of skirting,


The skirting and shelves are not glued in place yet as I want to dress the shelves first to save me fiddling around inside a room doing it.

Here is a reminder of where this room began having been gouged out of Dalton House.


Saturday, 6 November 2021

Sitting Room

 Frabjous day, Calloo callay...

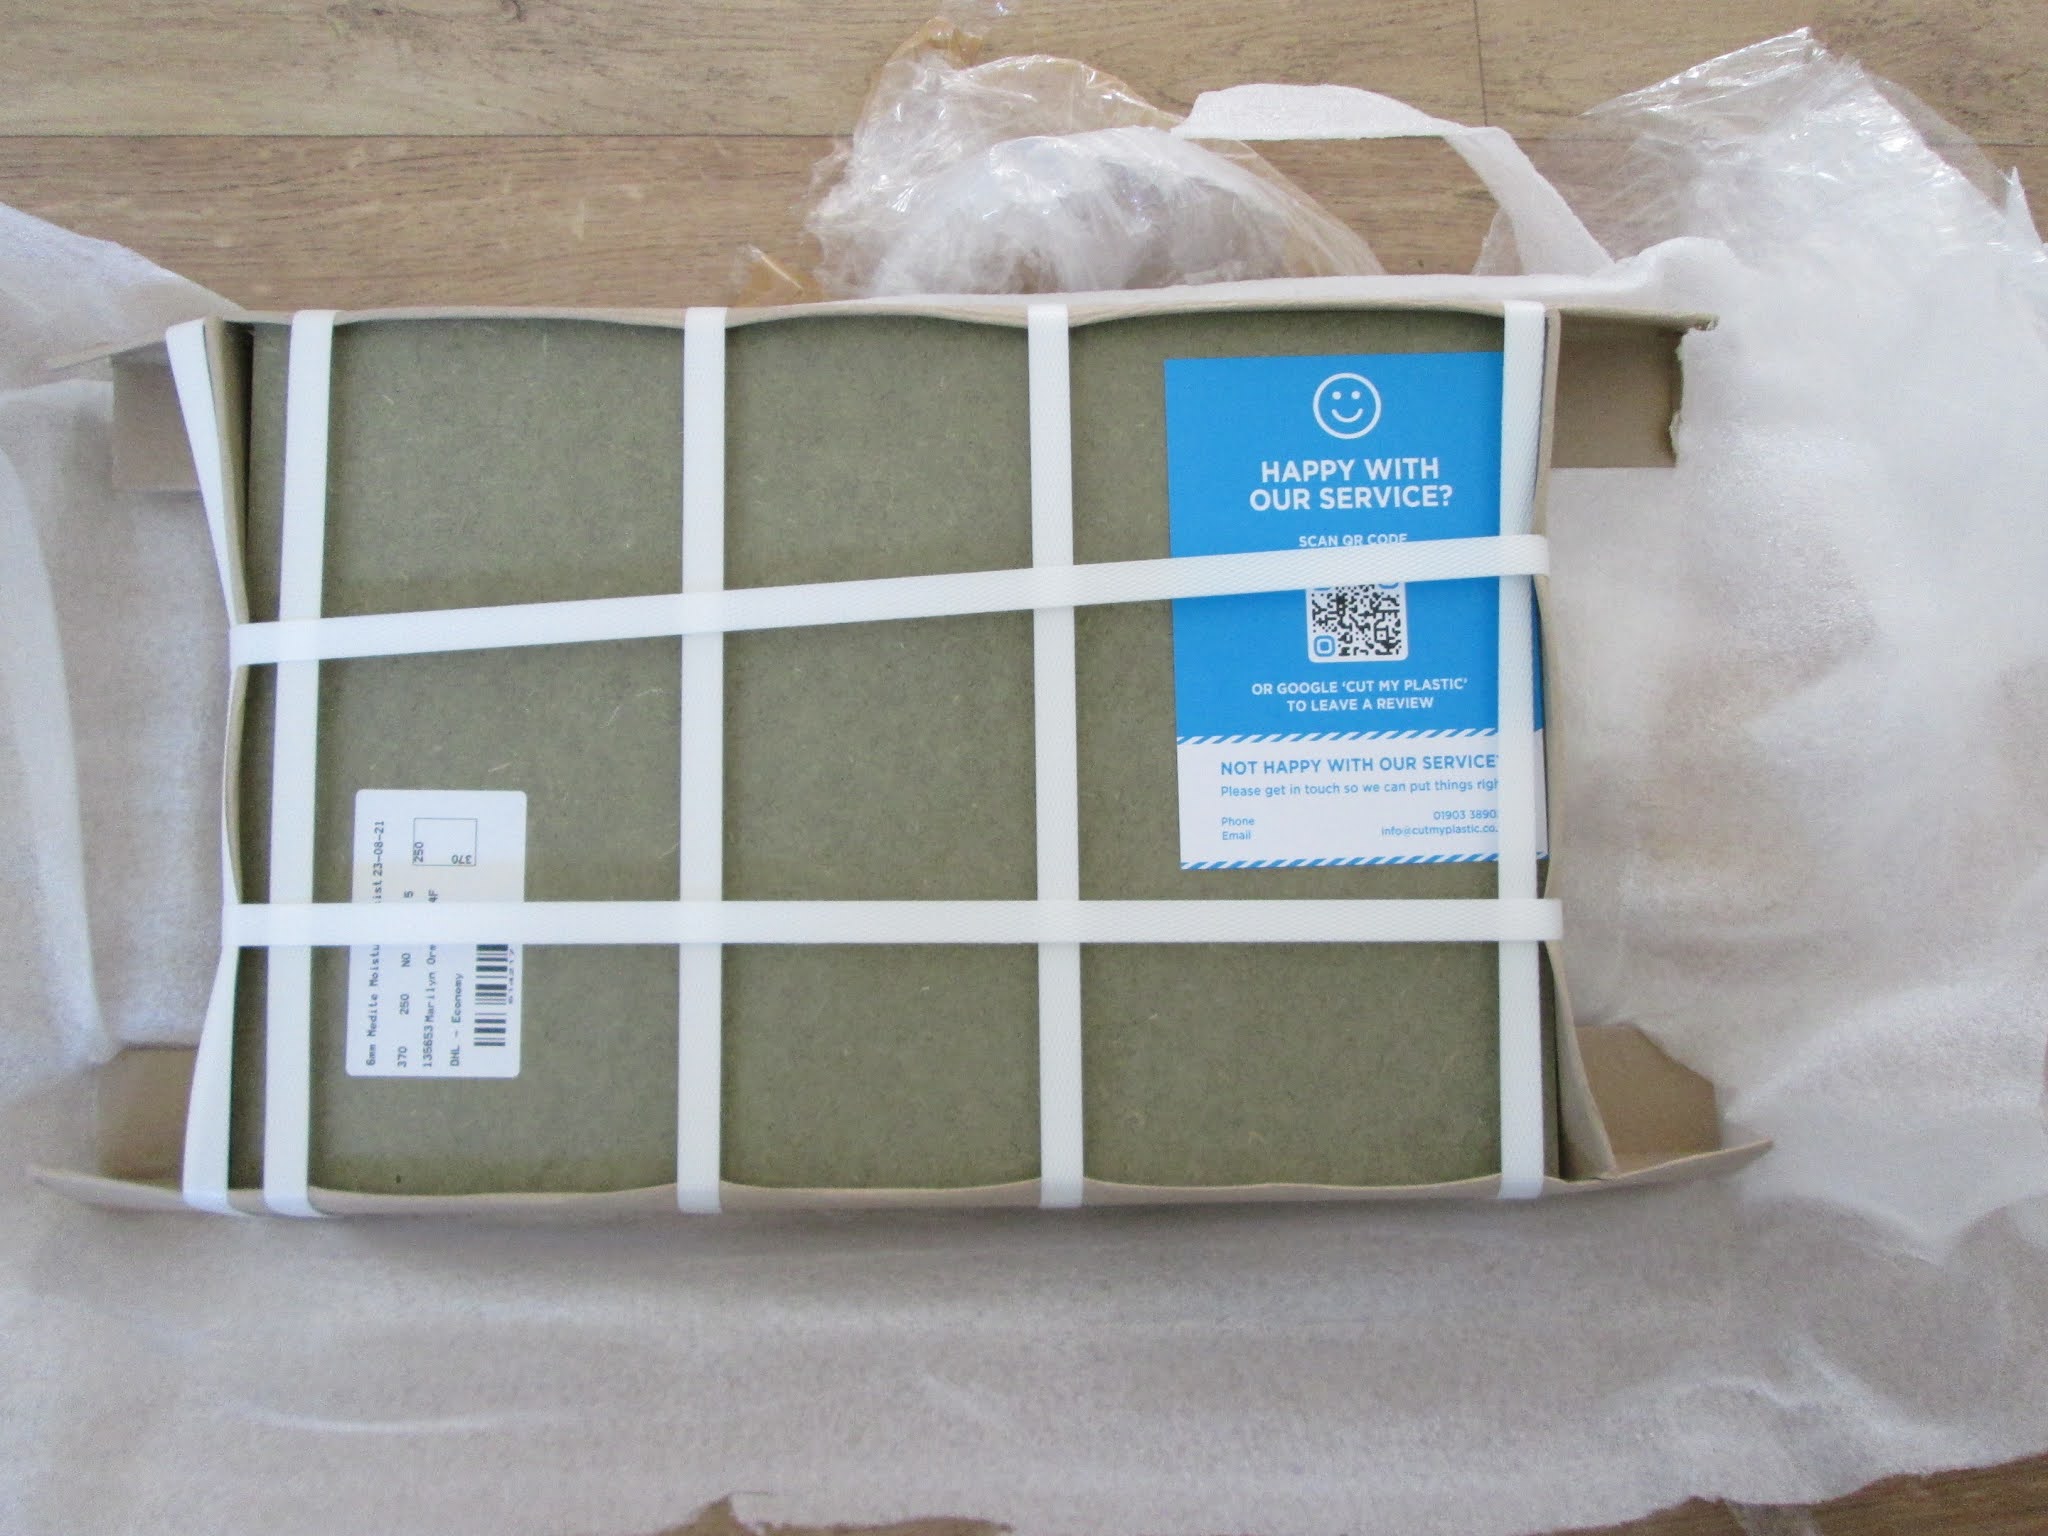
Having succeeded with the trial box,  I ordered and received the pieces for the other five boxes.  I am going to mention the company again as it was perfect service and perfect product and that is not something you can say often these days.   Cut my plastic   They offer many materials, colours, thickness etc and have lots of potential uses in your home and garden as well as your hobby.  Mine were cut to the exact mm, packed brilliantly so arrived in a perfect read-to-go state.

I am now trying to work at a good pace to get all the boxes made up for all the rooms.  There is no point in detailing how each is done as that will be extremely repetitive.  I will do my best to show you one a week furnished.  At the end of that time the plan is to draw all the electrics together and get those sorted and then it will be the fun part of dressing each room - again I hope to share one a week and then, my friend, that's me finished......   unless the mini itch strikes again.

Here comes the sitting room.... pretty much the same order of attack as the dining room but with small differences like half painted and half papered walls, a different fireplace fitting and table lamps exiting via pretend sockets.  

1. Glue

I made up the box and glued the chimney breast pieces together.


2. Paint

I painted the ceiling, two coats as before.  

For the lower half of the room which was also painted I marked up the line where the paint will meet the paper.  I do this by using a piece of stiff card cut to a three inch width.  I slide this round the walls and draw a pencil line where it comes to.  I then use masking tape to guide me when painting.  You could to this another way and roughly guess the three inches and paint and then mark up neatly for where the paper will go to and the paper over the excess paint.


The black splodge is where there is a gap in the fireplace for the smoke to go up the flue and you can see to the back of the box when it is in place.


I also paint all the trims and varnish the floor ready to go in place.  


3. Drill

There were four holes needed for the wiring in this room.  

The easiest was the central ceiling light.  

One was then needed on the back wall for the fireplace and was centred from side to side and at the right height for the wire from the fire to exit.

Finally two holes were needed for the table lamps.  This was a bit of a fiddle as I had to put in the lamps and tables to see if the 'usual' socket position would work for them.  

Quite often in my new build real house the sockets are about two feet from a corner and eighteen inches from the floor.  I cut a template measuring two by one and a half inches and put that in the corner each side and marked where the socket should go.  I then put in the tabe and the lamps and decided that would work OK.


4. Floor

I cut the floor to size checking carefully at each step.  You do need a template if there is any doubt that your room is not a good even shape.  Luckily with these boxes they are pretty true in terms of being rectangular.  For the first time I didn't do a 'temporary' fix for the floors as they will never need to come out to fix any lights 'below' as they would in a project..  This time I removed the sticky back cover paper from the walnut flooring and laid it straight down.

5. Chimney breast

This fireplace required a slightly different treatment to the one in the dining room.  This time it is designed to fit snugly edge to edge with the fire surround.  Needless to say when I originally bought these things I settled for the nearest I could get.  There is a very tiny gap around the edge of the fireplace (which doesn't show as long as there is no light there) which needs to be 'blanked out with a black painted paper trim.  Here are the components for this fire.  The chimney breast and painted cardboard inner hearth as before, the blanking piece of paper and the fire.


I absolutely love Phoenix Model Developments for all kinds of thing.  Over the years I have bought tons of things from them - cookers, fires etc.  I did paint this one with a touch up nickel paint  but it isn't really needed


The chimney breast was painted and papered.  I make all the folds in the paper before gluing and used a paper scoring tool to make good creases and keep life simple.


The whole chimney breast and fire unit  was assembled and glued in place.  I hope you can see the little folded out edges on the paper that are glued to the back wall.  I do this for all wallpaper joins so that you get a really neat join with no gaps.  (PS I can now see in this photo how the fireplace is not set exactly centrally - sadly I didn't spot it before completing the room.  It now annoys me and sometime I have to work up enough courage to see if i can push it out and adjust it now everything is all glued in place.  Right now I can't see how.


6. Paper

The rest of the room was papered.  Please click here if you need lots of information about how to paper a mini room.  Wallpaper. and here if video is more your thing   Wallpaper video  I think there are a couple there.


7. Trims

Trims went in as normal - coving then dado rail then skirting.  The coving was a bit of a pig as it is dentil coving.  I had a lovely one when I did the original sitting room but it seems to have disappeared.  I found one vendor but it was 'out of stock' so I got a slightly different one which proved challenging to paint without gumming up all the spaces between the  'teeth' and, like its predecessor it can't be cut to make super clean corners as there is to much detail on it.


8. Electrics

The centre light went in just fine.  I threaded the wire through the hole, put tiny dots of super glue on the ceiling rose and gently and carefully pulled it upwards until the rose made contact, just then need to press for a few seconds and Bob's you uncle.

I wish I could say the same about the table lamps.  i have always loved these lamps but they have given me problems from day one - missing one ball foot when purchased, wonky lampshades, one light flickered until I could get the bulb seated properly and most of all the very fine wires are a real challenge.  I have had them for so long I had forgotten how to expose the wire from their painted (?) coating.  Too fine to use wire strippers, teeth and nails didn't work, knife pretty much just cuts right through.  Finally light bulb moment and I rubbed them gently with very fine grade sandpaper.   Note the magnifying glass which got used at every stage of exposing the wire and then joining it to some more wire once in place so that they can reach the connector strip.


I used the sockets (I invented) for added realism.  They are made by Delph Miniatures.  Basically you thread your wire through from front to back, exit th wall and stick the socket in place.  Extensive explanation is here.  realistic sockets.


Tah dah - light, fireplace, lamps all in place and all working


The comes the task of adding a couple of feet of wire to the back to be sure of being able to connect to the power supply eventually.

So, another box prepared and awaiting its furniture.
Saturday, 9 October 2021

The Dining Room

 With the box finally built and feeling pretty stable, I cracked on actually trying to finish the first room ready to dress.  

I did a quick review of everything I had and found every room was missing something with the exception of the  Dining Room,so this would have to be the first display box. 

I am not putting you through all the processes of painting and papering, flooring and trimming again as I covered that with the cardboard fiasco.  If you ever do want tons of detailed how-to posts and even my videos just visit Dalton House and use the search box or the links in the left hand column.  Everything you could ever need is there.

Here is the order of work for a room with a chimney breast and fireplace.

1. Paint the ceiling

2. If painting the walls do that next.  This room was being papered so the floor went in next. It needs to be in before the chimney breast so you don't have to cut flooring to fit round it.


3. Make up the chimney breast  including wallpaper- next week will have a how-to for this


4. Drill a hole for the wires from the fire in centre of back wall and at the right height


5. Glue in the chimney breast, using the hole in back wall and hole in the back of fire wall to centre the chimney breast on the wall.  As you can see I put a cocktail stick through both holes to get them aligned properly.  Check the space each side quickly before the glue takes.  This honestly went in spot on first go - they usually do.


6. Paper the walls  I had an unbelievable tortuous route to this wallpaper.  I was determined to find the paper i used before.  I will cut a very, very long story short and say I eventually settled on a fairly look good alike from Les Chinoiseries  and tried not to cry too much at having to pay long distance postage yet again.


7. Add the coving


8.  Add the dado (chair) rail

I use a piece of card to mark the walls for where the dado rail will go.

I even mitre the corner for this teeny trim


9.  Add the skirting


10.  Put in the fire surround and the hearth extension and. of course the fire.


It is now almost ready for the furniture and dressing.


I need to locate the position for the light to go in and make a final decision as to whether I am lighting the mini glass cabinets or not.  

The fire (and possible cupboards') wires will just be fed out of the back of the box and anchored in place with a few inches of masking tape.  The ceiling one will lie across the top of the box and be partially taped down and all will be passed to the centre of the back of the box.  They will then exit the bookcase through a hole drilled in the back of the cupboard.  There will be my usual connector on the centre back of the cupboard waiting to receive the wires.  I want to assemble and tidy up the wires for this in one go when all the boxes are ready for that stage so that the cupboard just gets moved one time for connecting to the electricity.


Saturday, 2 October 2021

Boxes - so here we go again

 After kicking the cardboard idea into touch I found a place online who cut all sorts of materials very accurately at a very good price.  Take a look around at what they can do - cutting, routing,shaping all sorts.

Cut my Plastic

Don't be deterred by the word 'plastic' they have lots of stuff.  I chose 6mm moisture resistant MDF.  I worked out  how I would want to construct the box and what its exterior dimensions need to be and with a teeny bit of maths to allow for the 6mm material thickness ordered the appropriate sheets.


(footnote:  I discovered when built there was a slight miscalculation here on the size of the back section, so don't use these dimensions.  It still gives you an idea of how to determine what you need but be always be aware of allowing for the thickness of material.  The sides should be 248 x 250)

They did an excellent job and I was happy with the price.  

The wood and cutting for the whole box was only £8.91 but then, of course, VAT , delivery and a small order fee kicked in but the whole box still cost me about twenty pounds.

(footnote:  when I ordered the wood for the other five boxes they came in under ten pounds each, what a fabulous price for a bespoke room box)

They arrived beautifully packed with some extend pieces of extremely hard cardboard to protect all four corners, so I started with spot on size and pristine edges.


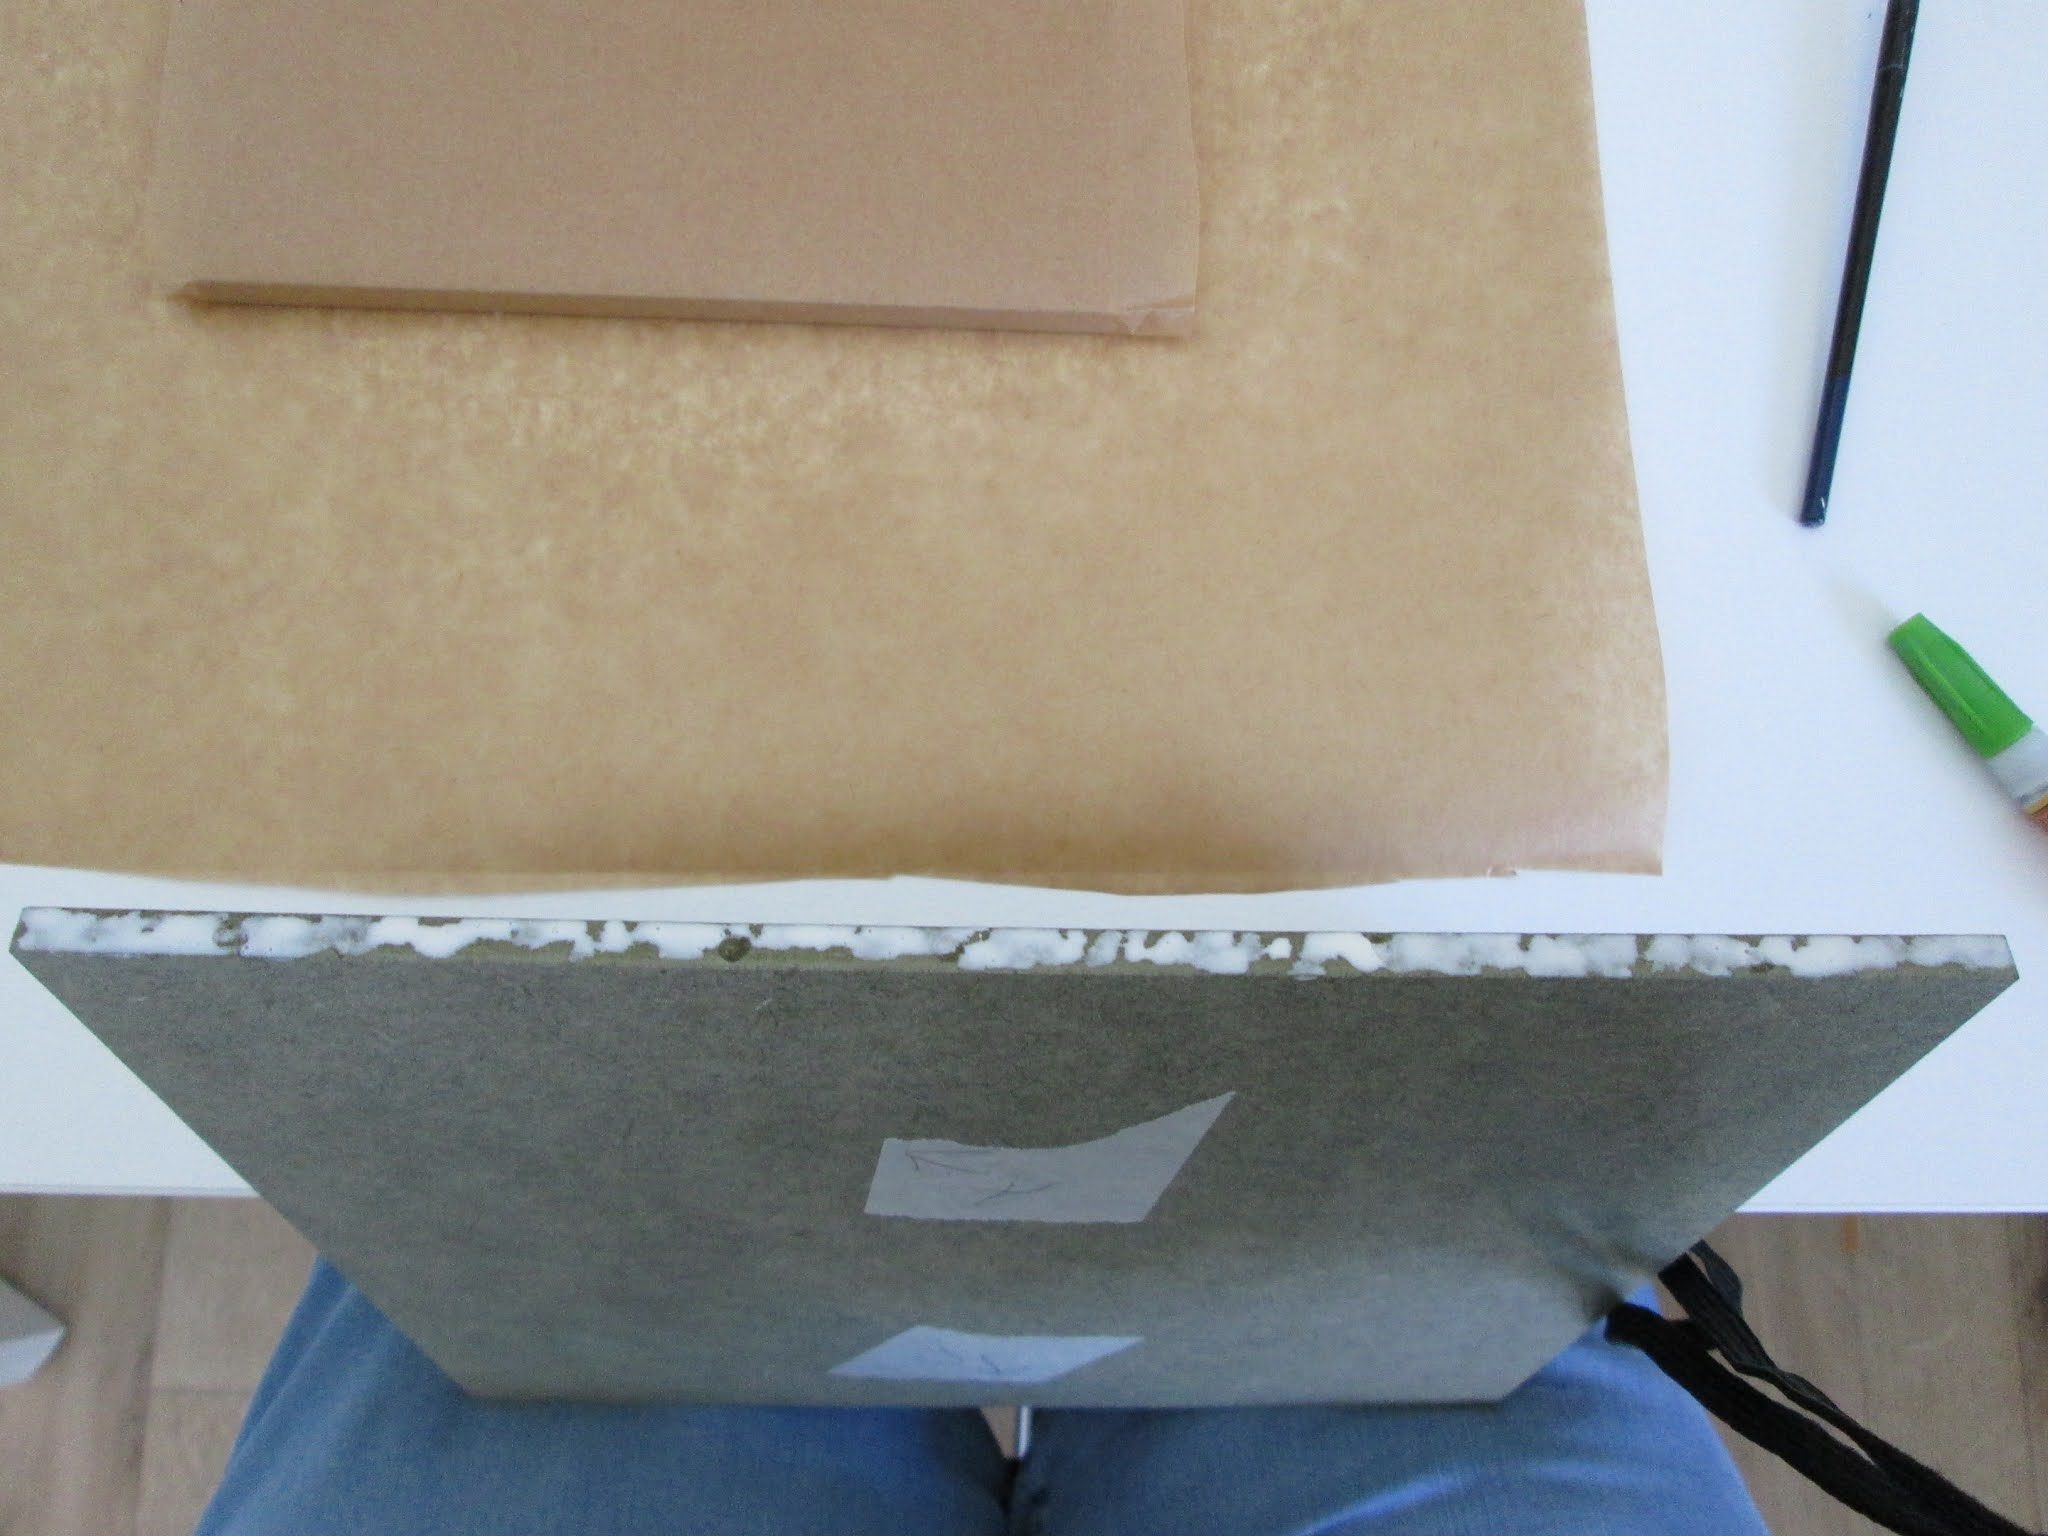
I set up the world's most sophisticated working area to try and act as a right angle jig to keep the boards square to each other as they were glued....  This consisted of silicone coated baking paper taped to the wall behind my little work desk, a piece taped to the desk (all to keep desk and wall clean) a piece of MDF shoved to the wall because there is a gap between my desk and the wall. 


The first two pieces go in place... this is the top leaning against the wall


I applied glue to the edge of the side piece.  You might be able to spot tiny dabs of super glue gel here and there in the wood glue just to give an instant grip while the wood glue sets up.  I promise you the dabs of superglue make a difference.  I forgot to add it to one piece and ended up hanging on to it for ages (twice) and, in the end, I had to relent and dab on the superglue dots.  There was no way I could let go of the pieces and get on with something else as they set up, just didn't hold without it.


The side was carefully pushed in place and held for a long while until I was fairly sure it was OK to release and let it dry


The next day I added some reinforced Kraft parcel tape.  I have no idea if this will help the joints but I am thinking the box will be handled quite a lot before it is finally settled in place and I am hoping this will just give it a bit more stability.


With lots of combined holding in place and taping for support the four sides were ready for the back.  this would be the moment of truth as to how square on everything is.


It feels fine.  So a day of patience while the back is weighed down with books and the making-of-a-room can begin again.


So far, so good.


- - - - - - - - - - - - - - - - - - - - - - - - 

Bit of a footnote:  

When I built all the various kits I have had I always painted the ceilings before the build so I didn't have to go inside a small space and perform gymnastics trying to paint it in situ.  I considered it for this too but I was a bit concerned about leaving a precise 6 mm edge paint free so that the wood glue could make a good bond.  This is not so vital in a large house construction as they are 9mm MDF and sides are slotted into routed grooves and there are layers of floors each stabilising the other.    Also, this being a box, it is easy to turn it this way and that and I will be painting the ceiling as if it were a floor which is easy.


Saturday, 11 September 2021

Boxes - trims/coving


While I was prepping the floor and doing the wallpapering I used the various waiting times to paint the coving.  First a coat of the same paint as I used on the ceiling, let it dry, then gentle sanding with very fine sanding sponge.  Then apply a second coat followed again by a light 'buff' with the sanding sponge.


To cut the trims I use a mitre block and G-clamp it to the table


.....  and cut with a razor saw.  You can get both of these pieces of kit in a set from various dollhouse suppliers.


Take your piece of coving and make your first 45 degree cut.  There is no simple way to describe how you work out which way that will be on your coving,  Do your best to visualise it and mark the direction with a pencil - you won't use that as a cutting line it is just a reminder of the way you want the cut to go when you take the wood to the mitre box.  After you have figured out a few it does become easier.  (If you want detailed help got to my Dalton House blog and click on the link in the margin labelled trims)  


Always start at the back of the room.  

I find that measuring the space very accurately is difficult; rulers don't fit conveniently and tape measures have some slack on them and are fiddly to use.  The easiest and most accurate way is to get some scrap paper longer than the space, crease a very sharp edge on one side and put in place snugly against a side wall, smooth across to the other side and use you finger nail to mark the crease where the two walls join.


Transfer that measurement to your coving strip and mark up on both faces so you can see the mark when it is in the mitre.  This mark is the point where your next forty five degree cut starts.  Make your second cut and it should fit perfectly.  


Glue in place. 

The two side strips are easier, you need to cut a corresponding angle and slide the piece in place and then mark off where the front of the box comes.  That becomes a simple ninety degree straight cut.

Glue in place.

At this point I am bordering on tearful.  Thanks to my old friend Mr Cardboard  this is where I discover that walls and ceiling do not make a lovely neat sharp right angle join so..... I can either glue the trim to the ceiling or to the wall but not to both!  I settle on gluing the coving to the ceiling and try really, really hard to disregard the gap where the wall is.


I pride myself on working to a fine tolerance and am proud of my coving and skirting and other trims all meeting spot on and finishing off joins beautifully, like this trim in the hall of Dalton House.


I now have to decide on 

  • whether to cut my losses and abandon the whole project
  • how to cut wood to make wooden boxes
  • seeing if I can get them made
  • carrying on with this one now I have got this far and see if I can just tolerate it as a sort of background to the actual things I want to display.
- - - - - - - - - - - - - - - - - - - - - - - - - - -

PS:  a couple of days later ......

Huge apologies I have just wasted a chunk of your life, unless you wanted a demo on not using cardboard for making room boxes.

After trims and floors were dry I took a dry run with the bookcases.  This showed me just how much the side walls were bowed.


I appreciate that this wouldn't matter so much on a room that just has normal freestanding furniture in it but in a room that requires bookshelves to go against a wall it just won't do for me.  Also one of my boxes will be a fully fitted kitchen and there is no way I can fit a kitchen against wavy walls.

I am upset on many levels.  As well as some hours of careful work lost I have also lost the wallpaper, flooring and trims.  The wallpaper was all I had left from the original Chinoiserie order.  I have just bought a couple of other papers from them again and it cost an arm and leg in postage as well as being quite pricey paper.  Ditto with the flooring from another supplier.  Even more exasperating are the three trims.  When I was ordering the things I needed for these six boxes I worked on lists for days to try and consolidate as many items as I could get from the least number of suppliers (postage saved) and then discovered I had forgotten these three pieces of simple coving.  I think the postage cost more than the trim and now I have to do that again.

Hey ho, do I delete these posts and just start this blog again or leave them to show things you might want to ask yourself if using cardboard?

Meanwhile I may have found a source to cut me some 6mm medite (moisture resistant mdf).   I have sent them a bunch of questions and hope to have an answer soon.