I thought it would mean less clutter if I furnish each box when it is done even though it probably means doing it all again when I get to the dressing-the-room stage; for example in the dining room I will need to access the display cabinets to fill them. I would still like to light these but I can't convince myself to drill a hole in a vulnerable part of an (expensive for me) mini.
Saturday, 30 October 2021
Dining Room - Furnishing
Saturday, 23 October 2021
Dining Room - wiring
Just a couple of quick pointers and reminders about doing wiring. As always if you want more detail and videos take a look at these posts in my Dalton House blog. You can also find some videos using the link you see there.
Here are a couple of useful tools. The first I would not be without if I had a a large project or I knew I would be making projects for years, is this handy wire cutter and stripper. Saved a lot of fingernails and teeth over the years when stripping off the plastic from the copper wires. I got mine from Small World which is now run by Little Houses Plus.
The second useful thing here is either a fine knife, like a scalpel, or teeny, sharp, pointed scissors like these embroidery ones. I use these to just make the first snip between the encased twin wires which you can then just gently pull apart. I have had them too many years to know where they came from.
Obviously the first thing is to decide exactly where the lights are going. I do this by furnishing the room. If you are lucky it may be just a simple centre light and that's it done but, in the case of the dining room that would have set the chandelier of to the back edge of the table. So I put the table where I wanted it to be and measured carefully from the front edge of the box to the centre of the table and transferred this measurement to the top of the box, centering it also from side to side.
Hoping this isn't a too obvious tip... I dampen a piece of kitchen roll and put below where I am going to drill the hole. I catches all the sawdust and being a bit damp stops it flirting about when you remove it and crumple it up.
When you drill the hole you often get a scruffy finish on the painted ceiling - generally this is easily covered by the light fitting and has never bothered me. I suppose to avoid this you could drill from the ceiling side upwards rather than downwards especially when using a room box as you could turn it upside down easily.
When you have your fire or light (etc) in place the wires will normally go in a groove to a suitable exit. With a room box grooves aren't necessary - which is a small joy as they are a pain to do. I simply taped them down with some masking tape. I may swap it for sturdier tape I think. They are being 'aimed' at the centre of the back of the box and a hole will be drilled through the book case at some time to let them pass through.
All the wires on the things I removed from the house are all sorts of lengths depending on the difficulty in removing them so they all need extending to exit the bookcase and travel on to the connector.
The important thing here is to remember to cut one wire shorter than the other on both the extension wire and the fitting's wire..
You then join the short extension wire to the long fitting's one and then via versa. This offsets the exposed wires from each other to ensure they don't make contact.
.... a shrink tube is pushed over them and shrunk with a hairdryer. Again, go to the link I gave earlier if you want more details of the process.
So, finally, the first room box room is ready to be lived in. One down and five to go.
Saturday, 16 October 2021
Dining Room - Chimney Breast and fireplace
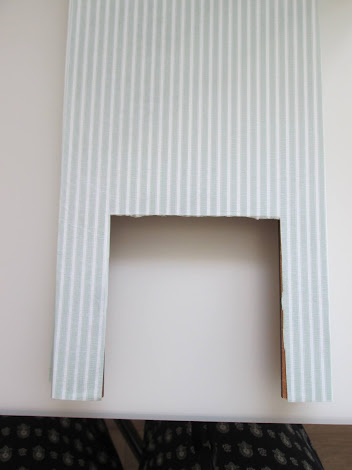
I have made chimney breasts quite successfully with thick cardboard but I have also bought a fabulous kit from Dollshouse Cottage Workshop so I did so again.
It comes in three simple pieces which you just glue together, making sure you have a good right angle join.
This photo shows how I line it up with the back wall and get it centered. I push a toothpick through the hole in the back wall and jiggle the chimney breast in place until the hole in the back of that lines up. Obviously I need the walls papered before the final fit.
In Dalton House I did wrap the skirting around the chimney breast but it is a real challenge to cut the front piece to an exact shape around the hearth and in real houses of the period I have seen it left off. Seems like the wallpaper would get easily damaged in real life when cleaning so I am not comfortable with the solution .... but if a grand house would risk it who am I to argue. Decision made.
Saturday, 9 October 2021
The Dining Room
With the box finally built and feeling pretty stable, I cracked on actually trying to finish the first room ready to dress.
I did a quick review of everything I had and found every room was missing something with the exception of the Dining Room,so this would have to be the first display box.
I am not putting you through all the processes of painting and papering, flooring and trimming again as I covered that with the cardboard fiasco. If you ever do want tons of detailed how-to posts and even my videos just visit Dalton House and use the search box or the links in the left hand column. Everything you could ever need is there.
Here is the order of work for a room with a chimney breast and fireplace.
1. Paint the ceiling
2. If painting the walls do that next. This room was being papered so the floor went in next. It needs to be in before the chimney breast so you don't have to cut flooring to fit round it.
3. Make up the chimney breast including wallpaper- next week will have a how-to for this
4. Drill a hole for the wires from the fire in centre of back wall and at the right height
5. Glue in the chimney breast, using the hole in back wall and hole in the back of fire wall to centre the chimney breast on the wall. As you can see I put a cocktail stick through both holes to get them aligned properly. Check the space each side quickly before the glue takes. This honestly went in spot on first go - they usually do.
6. Paper the walls I had an unbelievable tortuous route to this wallpaper. I was determined to find the paper i used before. I will cut a very, very long story short and say I eventually settled on a fairly look good alike from Les Chinoiseries and tried not to cry too much at having to pay long distance postage yet again.
7. Add the coving
8. Add the dado (chair) rail
 |
| I use a piece of card to mark the walls for where the dado rail will go. |
 |
| I even mitre the corner for this teeny trim |
9. Add the skirting
10. Put in the fire surround and the hearth extension and. of course the fire.
It is now almost ready for the furniture and dressing.
I need to locate the position for the light to go in and make a final decision as to whether I am lighting the mini glass cabinets or not.
The fire (and possible cupboards') wires will just be fed out of the back of the box and anchored in place with a few inches of masking tape. The ceiling one will lie across the top of the box and be partially taped down and all will be passed to the centre of the back of the box. They will then exit the bookcase through a hole drilled in the back of the cupboard. There will be my usual connector on the centre back of the cupboard waiting to receive the wires. I want to assemble and tidy up the wires for this in one go when all the boxes are ready for that stage so that the cupboard just gets moved one time for connecting to the electricity.
Saturday, 2 October 2021
Boxes - so here we go again
After kicking the cardboard idea into touch I found a place online who cut all sorts of materials very accurately at a very good price. Take a look around at what they can do - cutting, routing,shaping all sorts.
Don't be deterred by the word 'plastic' they have lots of stuff. I chose 6mm moisture resistant MDF. I worked out how I would want to construct the box and what its exterior dimensions need to be and with a teeny bit of maths to allow for the 6mm material thickness ordered the appropriate sheets.
(footnote: I discovered when built there was a slight miscalculation here on the size of the back section, so don't use these dimensions. It still gives you an idea of how to determine what you need but be always be aware of allowing for the thickness of material. The sides should be 248 x 250)
They did an excellent job and I was happy with the price.
The wood and cutting for the whole box was only £8.91 but then, of course, VAT , delivery and a small order fee kicked in but the whole box still cost me about twenty pounds.
(footnote: when I ordered the wood for the other five boxes they came in under ten pounds each, what a fabulous price for a bespoke room box)
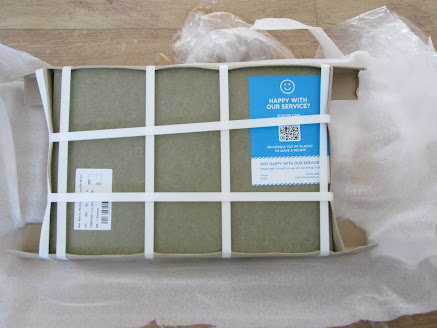
They arrived beautifully packed with some extend pieces of extremely hard cardboard to protect all four corners, so I started with spot on size and pristine edges.
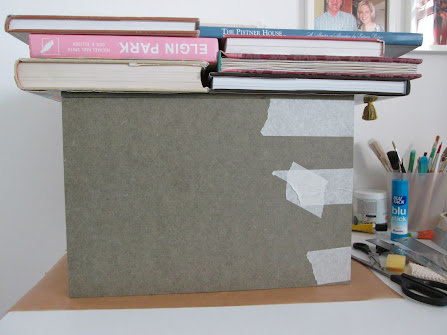
It feels fine. So a day of patience while the back is weighed down with books and the making-of-a-room can begin again.
So far, so good.
- - - - - - - - - - - - - - - - - - - - - - - -
Bit of a footnote:
When I built all the various kits I have had I always painted the ceilings before the build so I didn't have to go inside a small space and perform gymnastics trying to paint it in situ. I considered it for this too but I was a bit concerned about leaving a precise 6 mm edge paint free so that the wood glue could make a good bond. This is not so vital in a large house construction as they are 9mm MDF and sides are slotted into routed grooves and there are layers of floors each stabilising the other. Also, this being a box, it is easy to turn it this way and that and I will be painting the ceiling as if it were a floor which is easy.


